
Set Up Your Free Digital Stamp Card on meed
- Phil Ingram

- Nov 16, 2025
- 6 min read

Set Up Your Free Digital Stamp Card on meed
It's time to ditch the paper stamp card. meed is the easiest way to set up and create your digital stamp card in minutes, and consumers can join in seconds.
Most importantly, meed is FREE TO USE all features with a member cap of 50. If you need more than 50, then you go pro. By this time, it should be clear that meed is working for you.
This tutorial takes you through the entire process from creating an account to becoming your own first member.
What You Need
Prepare a few items in advance so you can complete this smoothly. You will need to enter:
A name for your loyalty program
A description where you can talk about your business, the program and how it works
Your logo in either square or horizontal format
Logos for the locations of your business where the loyalty program will work, if they are different in name or design
Optionally - an image you can use in the pre-designed poster that meed generates for your customers to join your new loyalty program on meed.
Create Your Account
Head to portal.meedloyalty.com and click on "Sign up for free". Enter your email address.

The system will send you a one-time password to verify your email address. The email will look like this:

Enter the OTP, and the following screen will be shown. Enter your name (first name only is fine), your company name (the entity that would pay the bill if you upgrade to pro later), and a password so you don't have to enter the one-time password again.

Click "Continue" to display the success screen. You are now ready to go to the portal and create your stamp card.

Create Your Free Digital Stamp Card
After clicking "Go to Business Portal", you will be taken to the create/edit loyalty program form. You are just a few minutes away from being live with your own free digital stamp card. Note. you will be able to preview your loyalty card as it appears in both Apple and Google wallets as you enter information.

Enter a name for your loyalty program (it could be something clever, or just the name of your business. You can change it whenever you want!
Enter a description. This appears in our consumer web app on the back of your loyalty card. A few lines about your business and the program will do. And you can add any special rules you want.
Finally, choose your industry. I am creating a coffee shop loyalty program here, so I have chosen food and beverage. Please have a look through the whole list, as more than one choice might be appropriate.

Now we turn to adding a location. To launch, you need to add at least one location. If you have more, you can add more, and for this demonstration, I am going to add two. Click the "Create Your First Location" box. A pop-up will appear.

Enter the name of the business at this location. It might be the same as your primary business name, or it might be one of several brands in your chain. Simply put, this is the name over the door as customers walk in.
Give it a location label - this is simply for use here in the portal and is not seen by your customers.
Add your street address without the country at the end, which should be automatically set based on your IP Address. If you are using a VPN, it might be wrong!
Finally, add your logo for this location. It should look something like the demo form below. Note, in my example, my location brands are not the same as the company name and logo.
IMPORTANT - Click Save!

If you want to add a second (or more) location now, save, then click the "Enter Location" button, and repeat the process. After saving, you will see left- and right-hand navigation arrows so you can check each location and select it for editing if you want to make any changes.

16. Now let's add your logo and links in the next section. This is the logo that will appear on your loyalty card - it may or may not be the same as one or all of your locations, that depends entirely on how your business is set up. We make it flexible enough to cover most, if not all, possibilities. You can also enter a link (with the clickable text) which can be anything from your company website to your terms and conditions, as you see fit.

Choose the colour for your loyalty card. This will also be the spot colour in any rewards or coupons your customers receive. You can either pick from the colour palette or enter an RGB Hex code directly.

We're almost there. Scroll down to the next stage, where we will set up your stamp card. Here, you will set how many stamps your card has, which stamp positions will trigger a reward, and whether to use options such as CHECKIN or SCAN.

First, select how many stamps you want on your card, then click the stamp positions that you want to trigger a reward. The last position must always generate a reward, but you can select as many as you like. As you toggle a reward position on or off, a new reward dropdown will appear underneath. In my case, I want a nine-stamp card, with rewards at positions 4 and 9.

To create your first reward, select the drop-down and click "Create NEW reward".

A pop-up will appear:

Choose the reward type: discount, cash or item. If a discount or cash, it will ask for the name of the reward and the amount as either a percentage or cash; else if you choose an item, it will just ask for a name. In this example, the reward for the fourth stamp position in my loyalty card is a 20% discount on food items.
Finally, upload an image for the reward, check the preview at the bottom of the window, and, if happy, click Save.

After saving you will see your reward under your stamp card. Now, for the screenshot I have clicked the dropdown for the final reward, and you can see the reward I just created is now listed. All the reward you create and leave active are available to use for any active slot on your stamp card.

For my second reward, at the end of the stamp card, I am going to give away a free coffee, so I click the item and fill in the card as I did before.

After uploading the image, I then click Save.

In the first reward I created, I made a mistake! I need to edit the 20% discount reward. I used a picture of the coffee instead of a picture of the pastries. So, on your stamp card, click the orange button labelled "My Rewards". A pop-up appears showing the reward you created. To edit a reward, click the edit button.

Make whatever edits you want to make, in my case I am replacing the image, and then click save.

Finally, decide if you want to use CHECKIN or SCAN
CHECKIN means that if someone scans a QR code with location tracking (available from the locations menu) they will automatically get a stamp. This is limited to one location per day.
SCAN means they can scan the QR code, which triggers the receipt scanner in the consumer web app and automatically awards rewards based on the amount spent. This is aimed explicitly at sit-down restaurants.
Once you have checked everything, hit the big orange button that says, "Launch Loyalty Program". And now your program is live! You will be redirected to the program overview page.

Join Your Program
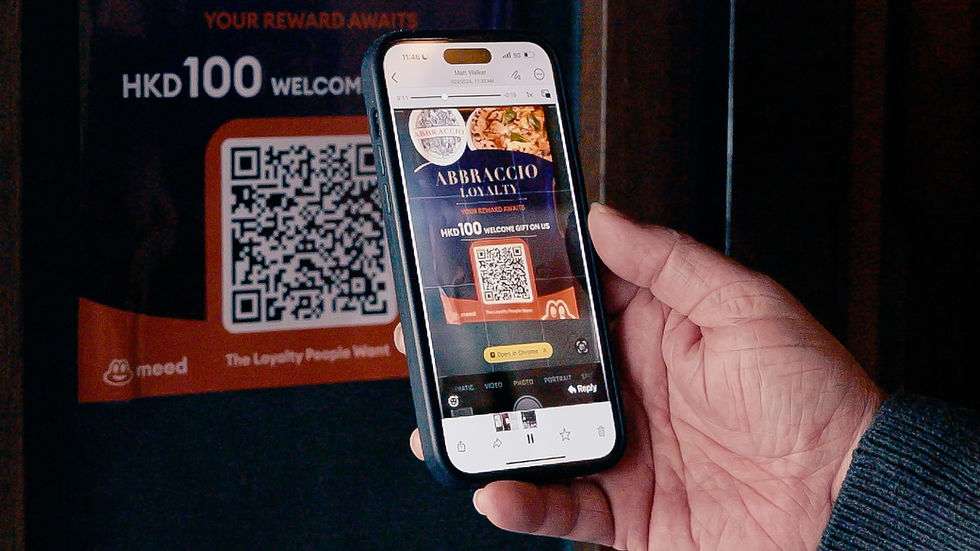
If you want to see what your customers will see, then try this out.
Click Posters and Social Links in the top-right panel to open a menu.
Click "Upload an Image for Your Poster"

Upload an image - minimum 1920 x 1200. This is for printing as a poster, so the high resolution is necessary.
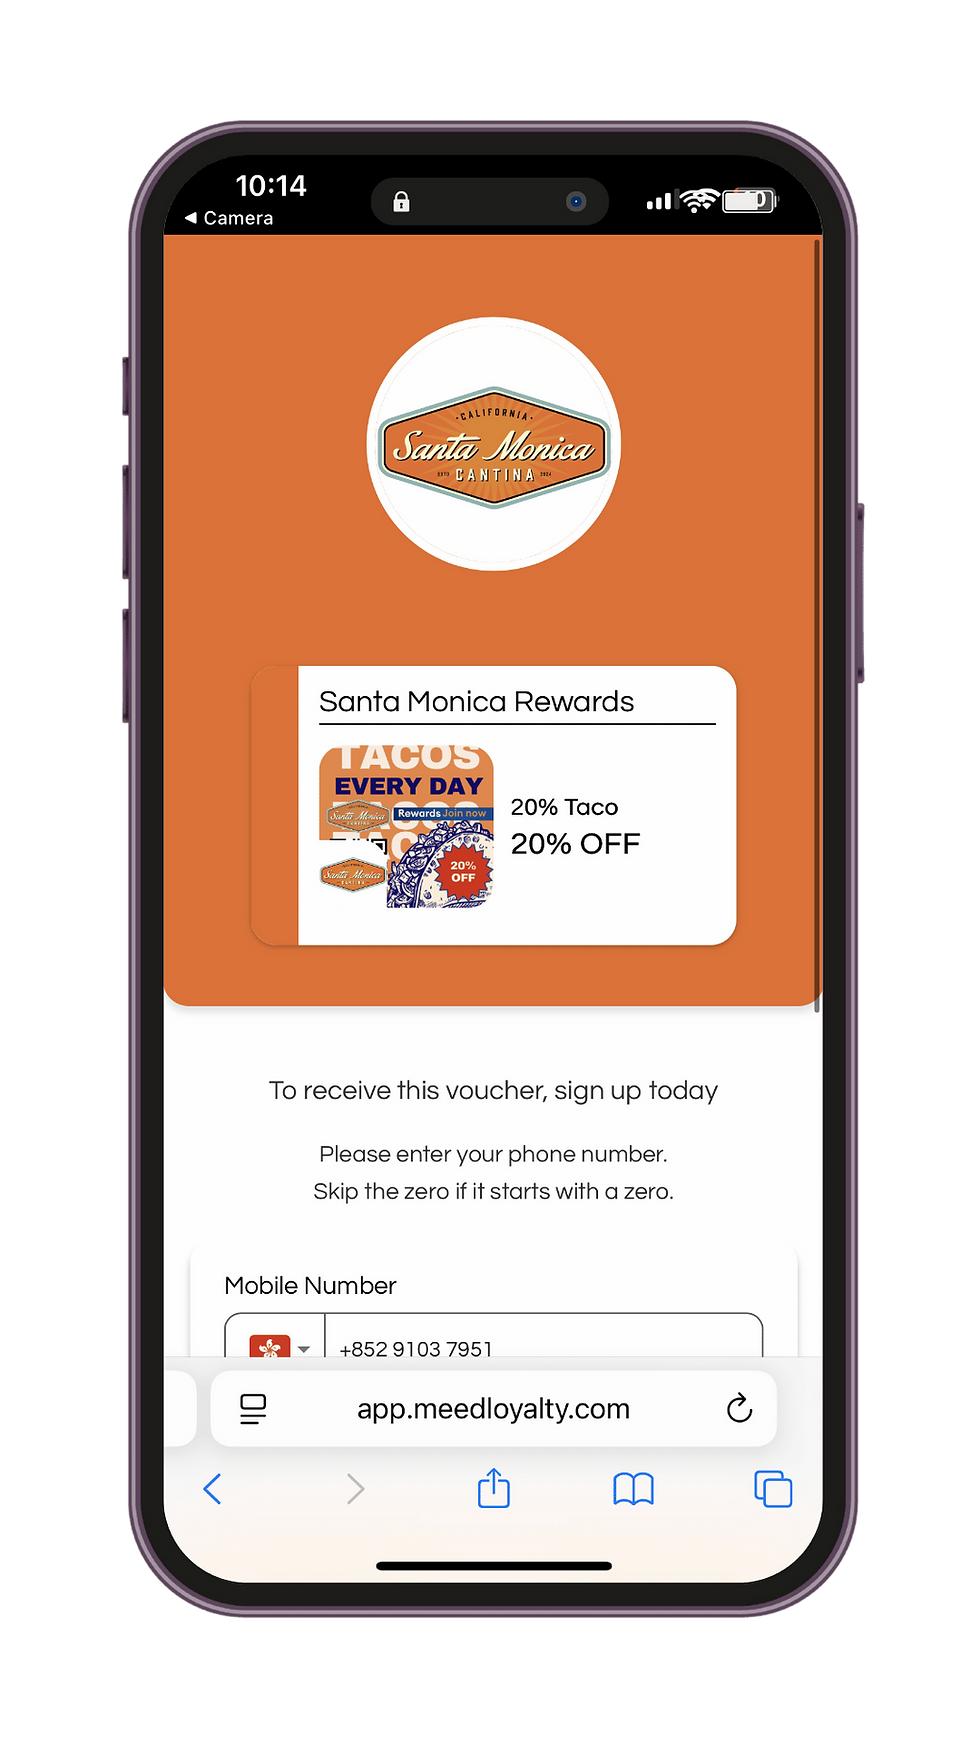
Now, click "General Membership Poster". A new tab will open with a standardised starter poster you can download right away. But what you need to do now is get your phone and scan the QR code. Follow the prompts and become a member of your own program. Here is the pass for the demo program used in this tutorial.


Comments